Here’s to planning with an eye toward tranquility, staying connected to our big dreams, and making meaningful experiences out of everyday moments. Thank you for joining me on this journey and for your support of this passion project! Bisous. x
Watch
Click HERE or stream the replay below. Thanks for tuning in!
Prepare
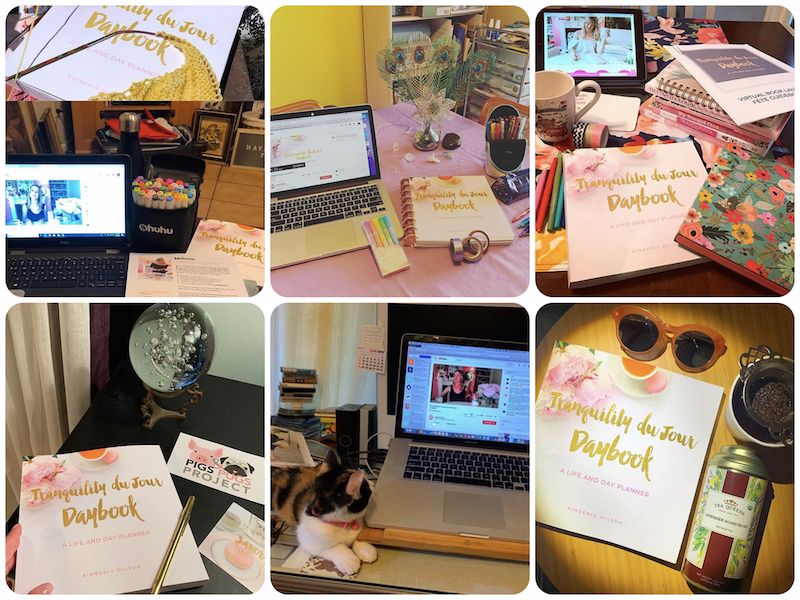
Bring your Daybook. Gather your creativity tools (washi tape, ephemera, markers). Set up your space. Print and review your Event Guidebook PDF. Bring your dreams.
Treats
A gentle reminder that all of your Tranquility du Jour Daybook bonuses can be found HERE. Please bookmark this page to access again and again!

Giveaways

Share photos from your set up, Daybook Event Guidebook, takeaways, pet(s) joining us, and more using #tdjdaybook.
Resources
Daybook connoisseurs Nikol and Barbara’s share their Daybook personalization and inspiration below.
From Nikol (@mibfwlk)

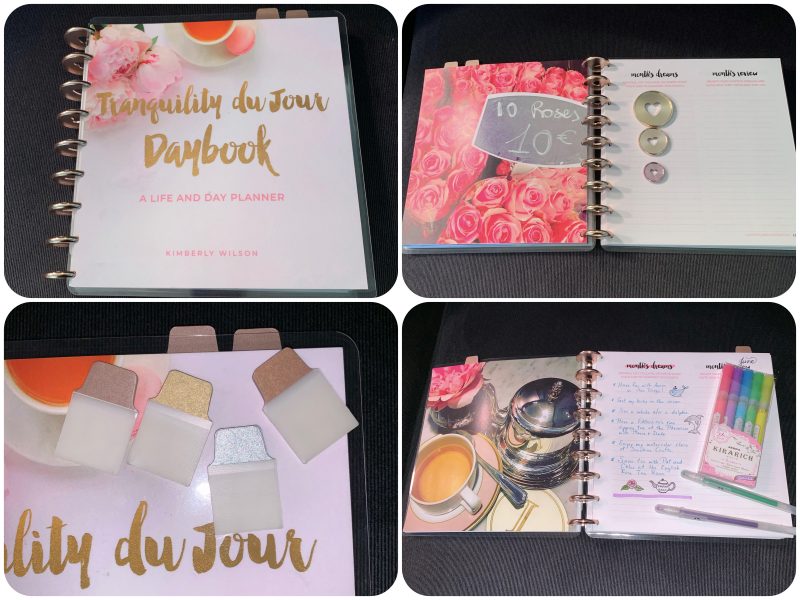
- Use a discbound system! This lets you move things around and take out any pages you don’t need. It also lets you keep something important, like a yearly habit tracker, right with the current week. To convert your daybook this way, you’ll need to take it to an office supply place to have the spine cut off. You’ll also need a disc hole punch that can be found on Amazon or at Staples. The most elegant rose gold discs with hearts in the middle are made by Happy Planner and can be purchased at most hobby stores like Michael’s and Joann’s.
- Use adorable sticky tabs! This helps you quickly and easily find important pages or the current week. They come in pastels, bright colors, and even metallics. Hello rose gold!
- Laminate that gorgeous cover. You’re using this book at least weekly and probably daily for a whole year. You don’t want the cover to get ripped or ruined when you spill Paris tea on it. You can laminate it yourself with pouches or have it done professionally when you get the spine cut off.
- Splurge on the sparkle. It’s so worth it to invest in glitter highlighters and sparkly Gelly Roll pens to emphasize important things in your planner.
- Keep your daybook where you can see it. Now that you’ve customized it to be exactly the way you want it, it will make you smile with delight every time it catches your eye.
From Barbara (@barbarabitondo)
- TDJ DAYBOOK: Straight Up, or CUSTOM?
- For several years I printed the Daybook PDF, all pages as they come, in actual 8.5*8.5 Size on 11*17 paper then took the 200+ pages to a local print shop to be trimmed to size at the crop marks and spiral bound professionally. It took me a few false starts to learn how to set up the print run to ensure all pages printed correctly on the double sided paper, aligned on the page and so weekly spreads would open correctly. It also took me a while to learn that I actually prefer a lighter planner and it works best if I just print 2 months at a time and twice as many extra journal pages. If you’re just getting started, I recommend printing and binding the books as they come and learning which tools and resources you use most before going for a full-on customized planner.
- These days I put together a highly personalized sequence of sections, chapters, pages and elements from old Daybooks, Year of Tranquility, the GORGEOUS New Daybook, and even Tranquilologie! I include some pages printed on satin paper, others on card stock, colored sheets, vellum, and, of course, the basic recycled paper in my copier. I print all items, regardless of original size or format from the PDF, in color, centered on 8.5*11 paper in landscape. When sections are printed and assembled, I have it trimmed at a local print shop to 7.5 by 7.5 spiral bound. This print and paper size is smaller than the Amazon hardcopies (which I also have and refer to) BUT, this size fits in my purse. Using 8.5*11 paper is easy to find, and most copiers accommodate this size. I also print and make my own stickers and “washi” strips on full 8.5*11 page stickers featuring the sweet birds and other darling images from Tranquilologie and the 2014 Daybook!
- I trim Pendaflex milky white plastic sleeves and fashion them into pocket covers and spiral bind in white.
- What I like so much about the TDJ system is that the various looks of the materials work well together and when bound make a pretty pick functional guide that I carry and use daily at work, at home and everywhere in between.
- KNOW THYSELF!
- Making a customized Daybook takes time and practice. It is best use of resources to know clearly which elements you like and actually use and the sequence that works for you each month, quarter, week and year – and just print those.
- I always print many extra journal pages and background image pages (hello peonies, roses and teacups) on cardstock and intersperse these in my books so I can add items I forget, journal more (always a good idea) and add new checklists, TDJ Live pages, and of course my own collages.
- I find it helpful to have sections with various kinds of paper for various projects! Hello Dot sheets and lined pages (2019), coffee mark pages (2018), and blank pages with pink edges (2014). I also insert tab pages so my Daybook is also a project planner/journal. I have learned that I am a one-book person, maybe you are too!
- I also find it is faster to print / assemble my books, if I repeat the same sequence for all months in my book. For instance each month opens with the related Year of Tranquility Chapter Reading and weekly Prompts, this is followed by the month from Tranquilologie. 2014 Months Dreams is followed by 2019 TDJ elements (Moon Pages, 30-day challenge, monthly planner) and then 5 weeks of weekly spreads. Between each weekly spread I include lined , dot and flower pages, the weekly wellness planner and expense tracking.
- Learn how to TALK TO YOUR PRINTER! (hint, there is more to it than control+P)
- Customizing for newbies can mean a lot of wasted paper, unless you are very familiar with the printing settings for your machine. To avoid loss and waste, print in small batches. I also keep a list of the elements and the order and how many sets if any page I will need from which books.
- To print from two books (e.g. Dot pages from Year of Tranquility and weekly layouts from Daybook) it is easiest for me to print single sided from one PDF, return the printed pages to printer upside down, and print on the other side from the other PDF (this is where knowing how your paper feed works is essential, as is a lot of self compassion). It took me a while to learn how to set up the print run and paper in the manual feed to get all footers aligned.
- I rarely print TDJ/Year of Tranquility pages in order, so learning the difference between “print pages 1-10” and “print pages 1, 10” is critical, as well as size, position settings and orientation.
- PRINT ONCE, BIND ONCE!
- Before dropping off the book, flip through the whole thing, and flip through it again!
- Its heartbreaking to make a book and have the printer put the binding on the wrong side and have the weekly spread open in reverse.
- I make a special top page (that i rip out post binding, and use a highlighter to indicate crop marks and also indicate where the binding should go with a post it and a marker.
- I also bring an old book to show what the end product will look like (since I often use a similar structure but the person behind the counter doesn’t always know/remember!
5. INVEST IN QUALITY
Nice paper, professional trimming and binding costs money and makes for a better planner experience – there is no sense going to all the trouble I go through if the end product is not pretty! The new planner is so pretty and a real steal, compared to printing and binding a DIY project. Maybe you’re an off-the-shelf TDJ person after all
6. GREEN IS THE NEW BLACK
Now that I have a set size I re-use the plastic spiral binding multiple times and archive the old planners for year end review.